Friday 17 November 2017

Brompton 2017 Luggage - Ortlieb O bag

Brompton O Bag

Dear handsome intelligent reader, it's now almost 2018 and we started to write this in 2016!
Brompton O Bag in the corner of a room with lamp and sunflowers
Spotlight on the Brompton O Bag

Brompton again have a new range of luggage to fit the front carrier block (the most essential upgrade to any Brompton bike?)

But where to start, with our favourite luggage item - the Brompton O bag (O standing for German company Ortlieb - as it's made in conjunction with the top name in waterproof bicycle luggage)

Rather than try and complete the post, we're going to build it and add to it - so if you have any questions, then just drop us a line here

We're going to try and list all the features, then expand on them (maybe not all today so you may need to check back)!
Choice of colours
Which Brompton(s) will it fit?
Waterproof
Two removable waterproof cary bags / containers
Carry strap
Built in carrier block attachment
Carry handle with reflective braiding
Laptop pocket
Zip up internal pockets
Built in key holder

Brompton O Bag colours

The Brompton bag, made (as said before) in partnership with Ortlieb was first introduced in 2010. It was the first true waterproof luggage item for the Brompton. It has been available in various colours, some discontinued one year and introduced a couple of years later.

For 2017/2018 the Brompton O bag is available in just the following colours (assuming you count black as a colour):
Black
Reflective black (new for 2018)
Grey (new for 2018)
[need pictures of the new 2018 bags!]


Different coloured Brompton Ortlieb bags
Brompton O bags - pre 2018 season colours
The above image isn't the best - but it will give some idea of the O bags that have been available

Older colours - these will gradually become unavailable as stocks sell out, but are currently still available to Brompton dealers:
White
Orange
Lagoon Blue

Brompton O bags - orange with old logo and white with new logo
Brompton O Bags - old and new logo
Pre the 2016 revamp (logo design / improvement) colours:

Yellow - Introduced in 2014, then doscontinued in 2016

Red - Introduced in 2014, then discontinued in 2016
Apple Green
Arctic Blue - Introduced in 2014, then discontinued in 2015
White - Introduced in 2013, revamped (with new logo) in 2016

Pink - Introduced in 2010, then discontinued in 2013


In the picture you can see the old (on the Orange bag) versus the new (on the white bag) logo - this changed in the 2015/2016 model

Which Brompton(s) will it fit?

Here we are referring to the handlebar type

The O bag is designed to fill all Brompton handlebar types - even the S-type. But it does have a proviso that the bag should not be over-filled (as that would stop the bars turning correctly) when used with a S-type (straight / sports style) handlebar equipped Brompton.


Waterproof

The main bag looks to be based on the Ortlieb Downtown bag - but built for mounting to the Brompton front carrier block instead of a standard bike rack

It is waterproof to IP53 standard (5=protected against dust, 3=protected against spray watermax. 60° to the vertical) - but to meet this the top must be completely closed

Brompton O bag - showing two waterproof removable bags on the back
Two waterproof bags on the back of the O bag
In addition to the normal features found on the Ortlieb Downtown bag, the Brompton makes use of the fact that it doesn't attach to a standard rack by making  use of the back of the bag - with two removable waterproof bags

These two bags can clip onto and off of the back of the bag - and feature a roll top top - to ensure they are really waterproof - great for storing your phone etc in the wettest weather

One really neat feature is that one of the two bags has fixings on it to attach the main shoulder strap to - so if (for example) you are away touring for a weekend, and leave your Brompton / O-bag in the hotel, but want a small carry bag for your valuables (passport, phone, keys, small wallet) - then it can be used for that

One of the neatest features - often overlooked - that the waterproof rear bag can be turned into a small handbag!
That carry strap isn't just for the small bag - it doubles up as the shoulder strap for the main bag - making it easy to carry when not on the bike

The strap attaches and detaches easily

In the instruction leaflet (sheet) that comes with the bag, it does warn you to remove the strap from the bag when riding. This is for safetly - to stop ot from wrapping itself around the front wheel /  handlebars / passing car/pedestrian [insert of your own danger here!]


Built in carrier block attachment

Most of the Brompton luggage items (with the exception of this one and its baby brother / sister - the Mini O bag) have an internal frame (normally removable) which attaches the bag to the front carrier block

The Ortlieb bags have a built in heavy duty plastic mount which attaches to the front carrier block

In this picture you can see the front carrier attachment - allowing you to easily fit / remove the O bag to your bike


If you are looking to buy one - you can see the Brompton O bag range on the Brilliant Bikes website


Friday 13 October 2017

Brompton Bottom Brackets / Cranksets

Brompton Bottom Brackets and Chainset / Crankset Compatibility

As you can see - we like a bit of alliteration in our headings!

Let's start with recent history .....

In October 2017 Brompton bicycle made a recall on factory installed bottom brackets

Note: Non-factory fitted bottom brackets were not affected as they were of a different type

We're not going to write about that here - you can read all about it on the Bompton recall page
(It affected bikes in the serial number range  1403284144 to 1705150001 - all models)

What we are going to write about is the different types of bottom bracket supplied with/by Brompton and the compatibility with the different chainset/cranksets

Pre-2013 there was the fixed crankset


Brompton 44T fixed crank
The crank was permanently fixed to the chainring, and it looked like this (this is the 44 tooth chainring version). They are identifiable as they are shiny silver (depending upon how dirty yours is of course) and have a plastic chain guard (assuming it hasn't fallen off) which was held on with plastic lugs - so quite liable to falling off

Very, very infrequently the crank arm would work loose from the chainring (it didn't fall off - just became slightly flexible after years of use  - generally the teeth were worn out by then anyway!) - if that happened then the whole thing needed replacing

If you wanted to change gearing (e.g. reducing gearing from the standard 50T to 44T to make hill climbing easier) then again it was necessary to change the whole chainring / crank combination (and chain, and if changing chain it's also best to change the rear sprockets)

Brompton cranks fit to square taper bottom brackets - these get their name from the fact that they have square spindles, which taper towards the end. But unfortunately there are two (main) types in use JIS and ISO. The main difference is in the tapering

The fixed crankset fitted to a ISO bottom bracket (ISO stands for International Standards Organisation) - this is a type of square taper bottom bracket (and can easily be confused with a JIS version - but should not be fitted to that!)

ISO square taper bottom bracket (22 spline version)

The Bottom bracket used was mostly 119mm long but there were some Miche 122.5 mm ones used for a short time

The FAG ISO bottom bracked (shown here) uses a 6 notch tool for installation / removal

The FAG ISO bottom bracket used by Brompton could be itentified as it had notches cut out at the end of the spindle. The easy way to make sure is to replace the bottom bracket at the same time as replacing the crankset (bottom brackets are not overly expensive and do wear out too)

So remember - old fixed cranksets only fit to the ISO bottom bracket. If used in conjunction with a JIS bottom bracket they can work loose - this is because it will sit approx 4.5mm further out (and also affect the chain line)

The fixed crankset was discontinued on new bikes in 2013 and phased out as an after-market item in 2016

Next up came the ....

Spider Crankset / Chainring 

In 2013 came the spider crankset - here the chainring can be removed from the crank by undoing the 5 chainring bolts

The plastic chain guard is also better as it is fixed to the chainring using screws
Brompton spider crankset

Having a detachable chainring means that it can be replaced if it wears out or if you want to change the gearing of the bike

It has a more modern, brushed metal look and the cranks are held on with bolts done up using an 8mm allen key - which is easier than the rcessed bolts on the older cranks

In 2016 the BLACK edition (black instead of silver) was also made available as a general upgrade to the after-market

The spider crankset is available in 44 / 50 and 54 tooth options - and is the current (as of 2017) crankset un use by Brompton

The  spider cranks fit to a JIS square taper bottom bracket

Stronglight bottom bracket showing 22 spline fitting
Initially Brompton fitted to a FAG at the factory  - the FAG bottom bracked uses the Park Tool BBT-4 tool for installation and removal

The Stronglight  bottom bracket was offered by Brompton as the after market version instead of the FAG which was being fitted at the factory

The Stronglight bottom bracket uses the Shimano style 22 spline tool - BBT-22


Thun IBEX bottom bracket


Following the Brompton recall - they have moved to a Thun bottom bracket - as shown - this was also the bottom bracked used to replace the FAG ones during the recall

In late 2016 / early 2017 this same Thun IBEX bottom bracket was also used as the after-market version

Two things to look out of when removing bottom brackets:
1/ The bottom bracket cups (ends) are predominantly plastic - so treat them with care, else they can become rounded and difficult to remove
2/ The drive side (where the chainring fixes to), uses a reverse thread - so you do the normal tightening direction (clockwise) to undo it

FAG 6 notch bottom bracked installed in bike

You can see the bottom bracket fitting without removing the cranks as shown, showing the 6 notch FAG type, but not whether it is the square taper type (ISO or JIS) - for that you need to remove the cranks

We discovered (while changing bottom brackets as part of the recall) that sometimes there was a 6 notch tool and a 22 spline tool required (the drive side used a FAG type tool and the non-drive side used a Shimano style tool) but only on a small small sample of the bikes we worked on


Useful external resources:
Sheldon Brown - Square Taper Bottom Brackets
Park Tool - Crank Removal
Park Tool - Bottom Bracket Removal
Brilliant Bikes - Brompton Bottom Brackets
Brilliant Bikes - Brompton chainsets/cranksets

Thursday 31 August 2017

B&W Brompton box test

So, you are flying with your Brompton - and wondering just how to transport it?


If you are taking your Brompton on holiday with you by plane - then you want it to be happy and functional when you arrive, otherwise you may as well have just opted for a local hire bike - but you probably want your own trusted steed and to show it off to the world (or just test it's capabilities).

There are a few options, when it comes to Brompton transportation:
Soft bag from B&W
Brompton cardboard box - available from any good Brompton dealer
Polaris bike pod

We should have reviewed the Foldon box earlier. Is saying we were too busy a good enough excuse? (not really, but that's the only one we could think of)

We gave the new B&W Foldon box and the B&W Brompton Box a real life flight test

We took one of each on a short holiday to test them out out.

The journey went like this:
Home to airport
Check in box / bike
Fly
Collect box / bike
Store the boxes at the airport (left luggage)
Ride (including back to the airport)
Then repeat the process in reverse


Up first - the B&W Brompton bike box


B&W Brompton box at London Heathrow Terminal 5 drop-off zone
B&W box dropped off at Heathrow T5
The tried and trusted B&W Brompton box (or small folding bike) is tough like a camera case and has dimensions of a x b x c and weighs in at xxkg. It's a tried and tested box and been around for a few years.

B&W Brompton box in the back of an Audi TT
The B&W box in the back of a TT
The box has two roller wheels, a pull out handle and foam padding on the inside (which came unglued after the first journey abroad, but still functions)

To get the bike into the box, the saddle had to be right down (the Brompton had a standard height seat post - for an extended one the saddle may have had to be removed) and the MKS removable pedals removed. It was a bit of a struggle to get the bike in the box - bit it fitted OK in the end and the fact it was snug meant that it wouldn't rattle around and get damaged.

We also packed some clothes to act as padding!

Brompton B&W box at LHR Terminal 5 luggage drop off
Brompton B&W box on airport luggage drop-off belt

 The B& W Brompton bike box has two catches at the top which can be locked (we lost the key and don't lock it anyway so security can take a look inside if they want to) and a velcro wrap around strap which holds it securely closed.

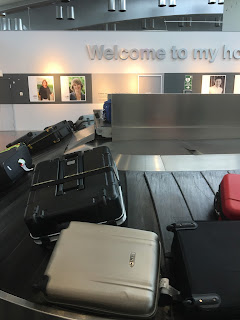
B&W Brompton folding bike box arriving on the luggage carousel
B&W Brompton box luggage arriving


It was transported to the airport in a suitably small car - and fit in the back with out having to put the back seat down.

It was checked in with normal luggage and weighed in at just under 20kg and sent down to the luggage department (with fingers crossed that it would make it to the other end of the flight)

We waited with bated breath at the other end (not actually knowing if the box would appear on the luggage carousel or at the oversize luggage counter!) - it appeared with all the other luggage with a loud clunk as the converyor belt spat it out.
Left luggage locker at Stockholm Arlanda Airport Terminal 2
Left luggage locker - the box didn't fit!

So - next, to find somewhere to leave the box and unfold the bike (hoping it arrived safe and sound!)

Finding a left luggage locker was relatively easy, but I made the mistake of taking the bike out before seeing if the box would fit.

Oh no! The box was too deep for the locker. So I had to wheel to the other end of the airport to the left luggage counter (bike in one hand and box in other, getting plenty of strange looks) where the box was safely deposited (at a cheaper per day price as it happened!)

The bike arrived safe and sound and was well behaved for 5 days of cycling!

However - on the return trip the Brompton suffered from a broken titanium front mudguard stay and a broken roller wheel.

Next up - the B&W Foldon folding folding bike box


B&W Foldon folding bike box - folded
The Foldon box was introduced by B&W in 2017 and folds up by using tough plastic which means it takes less space when being stored. It has slightly larger dimensions of 67cm long x 34cm wide x 70cm high when unfolded and resting on the wheels, but just a 67cm long x 34cm wide x 22cm high when folded for storage and weighs in at 6.1kg when empty.

First - the box has to be assembled:

B&W Foldon folding bike box - with Brompton inside
It comes nicely folded with a strap holding it folded - remember to take this with you. The box is like Zebedee - it likes to spring open!

As you can see from the picture, it has 4 roller wheels - these don't come off (or at least we don't think they do - let's see if they survive baggage handlers!)

The picture also shows the folded Foldon box next to a Brompton for size comparison.

So first the box top and bottom come off and there are hard plastic inserts (to make the walls), which are held together with aluminium and plastic strips.

The plastic wall (now one piece sits in the base and the Brompton is lowered into position.

As you can see from the picture, it has plenty of space around the bike - so we padded it out with bubble wrap.

When the box arrived - there appeared to be no exterior damage.


B&W Foldon folding bike box arrives on luggage belt
Once unpacked - easily done by releasing the two straps which keep the top and bottom attached firmly to the sides (these have holes so that you can attach TSA compatible padlocks if you want to stop other people opening it - though you could always cut the straps if you really wanted to get in)

The baggage tag had to be attached to these straps - the only doubt we had was that if the strap came undone, the tag would be lost - though this hasn't happened yet.


Conclusion - B&W Brompton box v. B&W Foldon box

First - they both do the job, and both Bromptons ended up at their destination in the condition we hoped for!

Travellers Top Tip: We were told (on a subsequent trip) by BA staff (several) and by a camera crew we bumped into at the oversize luggage conveyor belt that bikes / boxes are treated better on oversize luggage than when checked in as normal items.

B&W Foldon folding bike box
B&W Foldon folding bike box ready to go
Given the choice - the Foldon box has the following advantages, meaning this is the one we would choose (however - this is based on less journeys - so we need to update this over time):
It is lighter and folds up to a smaller size for storage.

The Foldon box has more space inside - so is easier to get the Brompton inside, and the pedals didn't have to be removed - though we did have to pack this out with bubble wrap to shop it shifting around too much which we think could lead to bike damage.

Compared to the B&W Brompton box, the Foldon is easier to roll around the airport - as it has 4 wheels and a strap for pulling rather than the pair of wheels and telescopic handle on the box.

When storing at the other end, the ability of the Foldon to be "smaller" could save money!


Friday 2 June 2017

Brompton World Championship tips

Mods to go faster if you are riding in the 2017 Brompton World Championships

It's summer, and Brompton World Championship race season

It cumulates with the London race (finale) which includes winners of the previous races.

Below is a list of the BWC schedule:


London / BWC final - 29th July 2017

Still to run are:
18th June 2017 - New York City
4th June 2017 - Monza, Italy

Already run races are:
29th April 2017 - Korea
23rd April 2017 - Japan
22nd April 2017 - Spain (Barcelona)

If you are there to race, not just enjoy the moment (which is also fun) - then we have added our top tips:


1/ Remove mudguards and rack
It's all about weight right?

Removing mudguards and rack will save you some weight (especially the rack), and if you are pushing very hard the flex can sometimes cause a slight rub of the tyre against the mudguard (especially if stays have got bent during transit!)

Remember - the front mudguard keeps the brake cable from rubbing on the front wheel when turning - so ideally you should fit a cable protector.

2/ Fit kojak tyres
Reduce rilling resistance.

"Who loves ya baby?" - Schwalbe Kojak tyres are named after the famous New York TV detective played by Telly Savalas - they are totally bald!

The reduced rolling resistance provided by the slick tyres will add speed - and they are lighter than any of the other Brompton tyres.

3/ Pump up the volume (tyres)
Flat / under-inflated tyres make you work harder

Check your tyre pressures and pump up to the maximum.

Heavy duty tyres such as Schwalbe Marathon Plus are so solid that you can't really tell how hard they are just by squeezing with your fingers. This even led Schwalbe to redesign the side wall as so many people were running them effectively flat!

4/ Change to a larger chain ring
Spider chainrings make this simple(ish)!

In 2013 Brompton introduced the Brompton Spider Chain Ring- the biggest benefit of this (in our opinion) is the increased flexibility of gearing.

Previously to change from (for example) a 50 tooth (standard 3 speed) to 54 tooth (high geared) chainring, the whole chainset would have to be replaced.

Brompton Spider Chain Ring / Crank Set
Now just the chain ring (and chain) can be exchanged to give you higher gearing and more top speed.

5/ Practice / get fit
Get out and ride

People always talk about saving grammes on their bike to make it go faster / more efficient .... but most of the weight is the rider.

Getting out and exercising will make the biggest difference to your ride performance :-)

Wednesday 8 March 2017

Brompton 2017 colours

2017 saw some new frame colours supplied by Brompton

It's now becoming a regular thing that Brompton changes out some colours each year - so they become almost a special edition in their own right - and thats without the additon of the BLACK, Nickel and New York Editions

Rather than having a surcharge for all colours other than black and white - there is now a surcharge for Stardust Black (think metallic style car finish - twinkles in the dayight) and Raw Lacquer (this one shows of the hand made craftmanship to its full)

Brompton Lime Green colour - new for 2015
2017 Brompton Colours - full list

Black
Grey
Ivory
Turkish Green
Racing Green
Tempest Blue
Red
Lagoon Blue
Lime Green
Berry Crush
Stardust Black
Raw Lacquer

As with previous years you can choose a bike in just one colour - or with the main frame in one colour, with the extremities (rear frame/triangle, handlebar stem and forks) in a second colour.

Titanium is available again - produced in the UK this time in a joint venture between Brompton and an external company.